Non-verbal communication is something we humans created long before the written word. Case in point-- The Lascaux Cave Paintings:
Flash forward to the 21st century:
The Visual Directions EduProtocol provides a non-verbal way to elicit student understanding through their own feedback. Here's the big idea:
Students are shown a series of images describing the directions to their next task, followed by a prompt. The teacher could then say, "Your directions are on the next slide. With your partner, determine what you are going to be doing." The teacher then shows students the slide, provides some think time, lets students discuss, and monitors their conversations. When the buzz of the conversations dies down, the teacher would then either select a few students to share out or elicit volunteer responses. The hard wait time for students to respond is critical here (especially the first couple of times we do this in class), as it is scary to take a risk on being wrong in this abstract way. Check out the example below:Academic Goals
- Clarifying the conveyance of directions
- Seeking input from learners to tell you their understanding of directions
- Visually telling directions in a few icons, makes clear what is essential to the task
Teacher Big Ideas
- One of the most difficult and tiresome parts of working with dozens to hundreds of kids is having to repeat directions multiple times.
- This process seeks to invite the students into the mix, to collaborate, to interpret and make sense of visual cues, and to take a risk in sharing their interpretation with a partner or whole class.
- Most importantly, it provides a pathway for students to make sense of what they are going to be doing from their peers and their own voices.
Prepare for the Activity
- Clarify your directions to no more than six or seven steps--usually three or four is a good number.
- Determine what word, action, or idea is most important for each step.
- Think of an icon or image that captures the essence you determined in Step 2.
- Create the images, use the Google Add-on "Insert Icons for Slides," obtain from the Noun Project, purchase the images, or use Creative Commons--licensed images to create your masterpiece.
- Ensure that the order of the steps flows with how you are displaying them on the slide.
Instructions
- In the learning environment, make sure everyone has a partner before showing the slide. Make sure you know how you would like students to share their learning when you come back together, and share this with them in the next step.
- Tell the learners, "On the next slide are the directions for what you will be doing for the next few minutes. With your partner, determine what those directions might be. When we all come back together, I will have you share out by..."
- Show the learners your created slide, walk around the room, and listen to the students' conversations. See if you can pick up what is standing out to them and what is still unclear.
- When conversations begin to slow down, bring everyone back together and have them share out in the process you described earlier. Allow two to four student groups to share, and then use their responses and fill in any missing directions.
Key Points to Remember
- You may select and sequence the responses of students if you hear something you'd like to share or to change up the variety of responses.
- In Step 4, it is beneficial to point at each icon (or image) as you describe what they are going to be doing throughout the process.
- Often, the first couple of times you do this, or with new direction sets, there is going to be confusion and misunderstanding. Anticipate that. Pro tip: see if you can test-drive your new slide of directions with people in your life that can give you honest feedback, and make the appropriate adjustments.
- The wait time is important; overcoming the inertia of not responding because of the novelty of the act and the dar of being wrong may be surprising at first, but it pays off once the responses start pouring in.
Adapting for Littles
Like in the "Eyes on Me" example, the slides should be appropriate for primary students to access and understand. Keep the amount of content to one slide per direction and keep it as simple as you can. All learners love it if you can be a little silly with this, like asking silly questions, changing your voice, or having them practice; little kids especially love this. don't underestimate what kids can give you when given the chance, just be sure to keep it to one slide per step and they'll be right there with you.Pro Tip
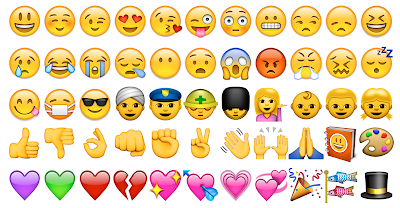
Label each icon with a descriptive filename and store them all in one place in your Google Drive. Jeremiah keeps his in a folder called ICONS so they're easy to find and use. Alternatively, try using the Emojipedia website to locate and share emojis.


.png)